
Imagine investing time, effort, and resources in project requirements, only to realize that the requirements were wrong. The consequences can be detrimental and lead to a complete waste of resources.
Without a clear vision of the business requirements of a project, it's easy to lose sight of the end goal and face costly setbacks. Fortunately, there is a powerful tool that can pave the way for a successful project: a Business Requirements Document (BRD).
Using BRDs, you can capture, communicate, and manage project requirements so your project stays on course. In this article, we'll explore BRDs, go over the basics and how to use them in various project management scenarios. We'll also provide you with an outline to use and practical tips to leverage BRDs effectively.
What is a business requirement document (BRD)?
A BRD is a document used to define a project's requirements. It clearly outlines the project's key functionalities, features, and goals. It also acts as an active resource in the project management process and is vital for creating project plans.
Simply put, a BRD documents the specific expectations an organization hopes to achieve. It defines the “what,” “why,” and “when” of the business needs and objectives.
BRDs also help bridge the gap between project stakeholders, teams, and clients. Aiding them to work together better and to avoid unnecessary requirements mistakes.
Business requirements vs. other requirements
A business requirements document provides a high-level view of a project’s business solution. While it paints a broad picture, it’s just one of several requirements documents that may be needed for effective project management.
As your project progresses and evolves, other specialized requirements documents may be used to address specific aspects in finer detail. These may include:
Functional requirements
A Functional Requirements Specification (FRS) or Document (FRD) is a step-by-step guide — or the “how” of the process. It covers specific tasks, detailing how each feature of a product or system will function.
For example, if your project is to build new software, the functional requirements could describe how users would log in, how data would be saved, and how the search feature would work.
User requirements
Each project is ultimately designed for users or consumers. A User Requirements Document (URD) captures end-users’ needs and expectations. It explains what users want and expect from the project or product.
It also addresses pain points the users might have faced before. This could be as simple as finding an item in an online store or being able to easily edit a document using certain software.
Product requirements
As you might guess, a Product Requirements Document (PRD) offers details about the product itself, such as its main features and purpose. For a new smartphone, this could include its screen size, battery life, and camera quality.
These details are important for design and marketing teams to shape the final product and promote it to potential customers.
Non-functional requirements
Lastly, there’s the Non-Functional Requirements Document (NFRD), which focuses on the overall quality and performance of a product or project. They describe how well a system can operate under certain conditions and constraints.
For a software product, this could include maintaining speed with thousands of users at once, bolstering security to protect against potential hacks, or guaranteeing accessibility for those with disabilities.
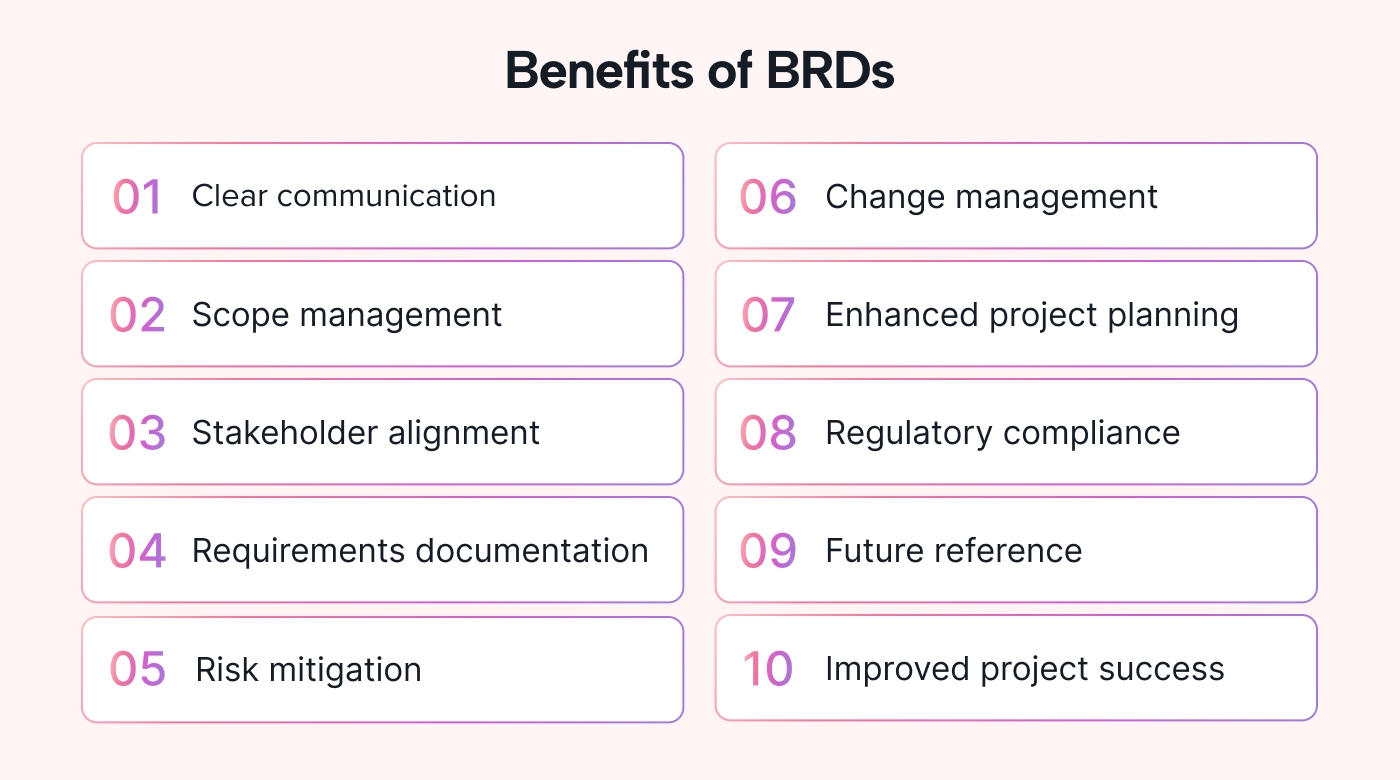 |
Benefits of using BRDs
BRDs have many benefits that help project get and stay on track.
The most obvious benefit is that it clearly defines the overall project requirements. In fact, according to research, poor requirements gathering is one of the main reasons many projects fail. So there really is no excuse for not using a BRD and reaping the rewards.
Let's quickly visualize two other important benefits:
- Imagine a project where the team faced unexpected changes to the expectations of the project. In this case, the BRD could play an active role in managing these changes well. The team can assess the changes' impact and ensure any addition is accounted for, not just in the BRD, but in terms of schedule and budget.
- Imagine a different situation where following regulations was important. Here, project managers can use the BRD to identify and include all the necessary requirements. This way, the team can make sure that the project meets the required standards and avoids possible penalties or delays.
Another advantage of BRDs is how they help teams prioritize requirements. This way, they can visualize the requirements and focus on meeting the most critical needs first.
How can BRDs be used?
BRDs act as a valuable reference for future project iterations. They capture and document essential requirements, so teams can refer to them when planning future projects.
Talking about improvements, BRDs also help with system enhancements. After project teams find areas for improvement, they can use the BRD to check how the new changes align with the existing requirements.
BRDs are useful beyond project management:
- BRDs act as valuable tools when working with external vendors or suppliers. With a BRD, you can articulate your requirements and expectations. This way, vendors can see what they are supposed to do, and there's honesty from the beginning.
- BRDs are also instrumental in finding gaps and inefficiencies in current processes. To do this, you should create a BRD for your business process and use it as a reference point. You can then use it to check if your business solution meets the list of requirements.
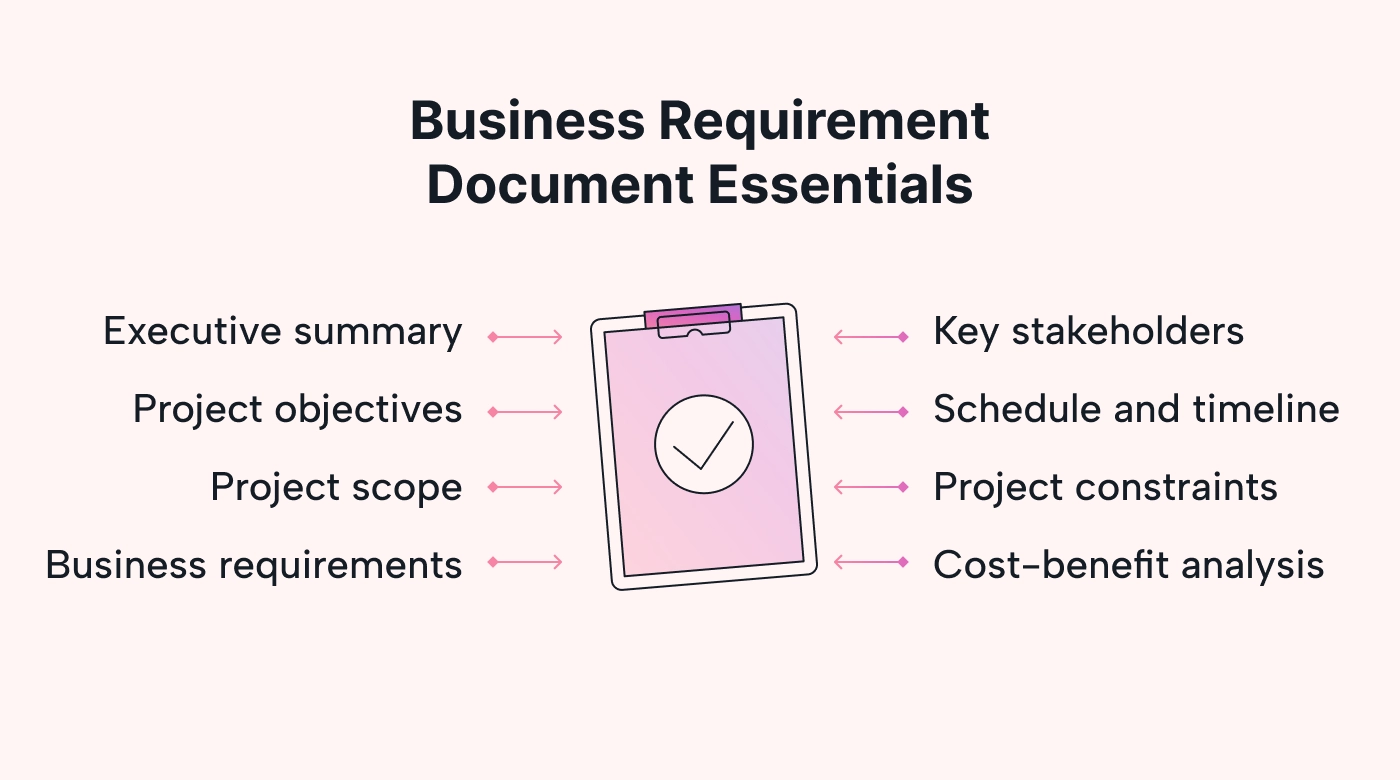 |
What should a business requirement document include?
A comprehensive business requirement document has eight main components. Let’s break down each one and go over its do’s and don’ts:
1. Executive summary
The executive summary is a snapshot of your entire project. This section offers a concise description of what the project is about, who it’s for, and what you expect to achieve. It’s like an elevator pitch for anyone who might not have the time to read the entire document.
Do:
- Keep it short and straight to the point.
- Highlight the project’s primary objectives and expected benefits.
- Mention the key project stakeholders or departments involved.
Don’t:
- Get technical.
- Use unnecessary jargon — the goal is to make the summary clear and easy for everyone on the team to understand, regardless of their role.
- Overpromise or oversell the expected outcomes.
2. Project objectives
Project objectives are the clearly defined goals that you aim to meet by the end of the project. If they’re clear, they’ll help guide your team’s efforts and remind everyone what they are working toward.
Project objectives are usually tied to key performance indicators (KPIs), which ensure that each goal has a measurable outcome that reflects the project’s overall health and progress.
Do:
- Make each objective SMART — specific, measurable, achievable, relevant, and time-bound.
- Align the project objectives with the business objectives.
- Clarify and distinguish between the project’s primary and secondary objectives.
Don’t:
- Be overly broad or vague.
- Set objectives without considering the available resources.
- Set too many objectives, as that might dilute focus.
3. Project scope
Think of a project scope as the lines on a soccer field. You know where the game is played and what’s considered out-of-bounds.
A well-defined project scope marks what’s included in the project and what’s left out, helping your team focus on the core objectives. This helps avoid scope creep — a situation where a project is unintentionally expanded beyond its original objectives.
Do:
- Clearly list what is and isn’t included.
- Regularly revisit and update the scope as needed, especially if changes occur.
- Include all stakeholders when determining the project scope so that you don’t overlook key details.
Don’t:
- Assume something’s included without documenting it.
- Make changes to the scope without proper review and approval.
- Forget to communicate any changes or clarifications to the project team.
4. Business requirements
Business requirements are the heart — or must-haves — of your project. They detail what your business needs to address, change, or accomplish to achieve project success. All tasks, from the initial brainstorming session to the final execution, should be mapped out.
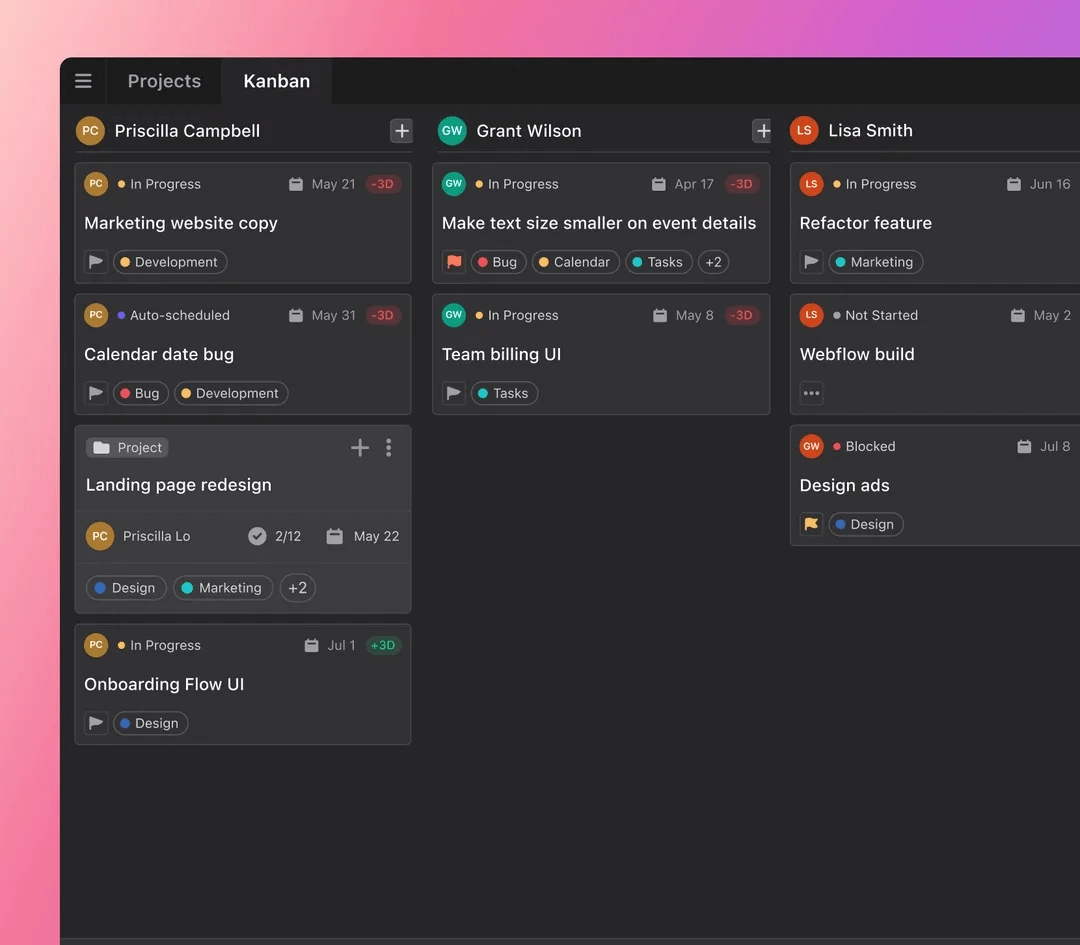
Tools like Motion can help streamline the entire task management process. Motion uses automation to help you prioritize the most important tasks in a project and delegate them to the appropriate team members.
 |
Do:
- Frame requirements in measurable terms. Instead of “improve the user experience,” specify that you’d like to “shorten the checkout process by two steps.”
- Identify and document how the business requirements can affect one another.
- Use an automation tool like Motion to make task management easier.
Don’t:
- Finalize business requirements without first getting feedback from stakeholders and end-users.
- Forget to consider scalability for future growth.
5. Key stakeholders
Key stakeholders are individuals or groups with a vested interest in the project. They can be top-level decision-makers or the end-users who directly benefit from the project’s final output.
Including key stakeholders in your business requirement document will let the team know who holds an important stake in the project’s success. It’ll also help the team more effectively address the needs and expectations of those most impacted.
Do:
- Identify all relevant stakeholders
- Provide a clear description of each stakeholder’s role and responsibilities
- Make sure stakeholders’ interests and concerns are considered throughout the project lifecycle.
Don’t:
- Underestimate the impact that stakeholders have on project success.
- Omit any significant stakeholder groups.
- Assume that all stakeholders share the same goals or concerns without verification.
6. Schedule and timeline
The schedule and timeline section should detail the major project milestones and expected project completion date.
It’s important to include this information because timelines offer a structured project overview that makes project planning and execution easy. As a result, the team can be sure of the project’s progression and deadlines.
Staying on top of your project schedule can be challenging, especially when managing multiple tasks and deadlines. Motion helps you track project progress in real time so you are always aware of the project’s status and can make timely adjustments when needed.
Do:
- Define your milestones and purpose in clear detail.
- Set realistic, achievable deadlines.
- Regularly update your schedule and timeline throughout the project.
Don’t:
- Be rigid about schedules or timelines changing. These things happen.
- Add irrelevant milestones that don’t directly contribute to the project’s progress.
7. Project constraints
Project constraints occur when you identify potential barriers or limitations that might affect the project. These constraints can come in various forms, including budget restrictions, technical limitations, and poor resource allocation. Identifying them upfront prepares all stakeholders to understand the project’s challenges and make informed decisions.
Do:
- Present a realistic assessment of each constraint.
- Order the constraints from biggest potential impact to smallest.
- Include initial ideas on how each constraint can potentially be addressed or mitigated.
Don’t:
- Downplay the identified constraints.
- Be overly pessimistic. This may cause unnecessary panic or lower team morale.
8. Cost-benefit analysis
Cost-benefit analysis involves comparing a project’s expected costs to its projected benefits. It’s essentially the project’s value proposition.
Surprisingly, one in five project managers admit to struggling with accurately “scoring” the value of a project — meaning that 20% of projects may have an unknown or incorrect project value.
The cost-benefit analysis section of a business requirement document exists to help ensure that the stakeholders have a clear understanding of the financial implications and potential returns associated with the project.
Do:
- Thoroughly research and collect data (use reliable sources).
- Express costs and benefits in measurable terms, such as monetary values or specific metrics.
- Consider both the direct financial costs and indirect factors that may influence the project’s value proposition.
Don’t:
- Rush through the analysis and present inaccurate calculations.
- Focus solely on quantitative data. Qualitative factors, like user experience, brand reputation, and environmental impact, can significantly affect a project’s value.
- Overlook potential risks and uncertainties; instead, address them.
Write an effective business requirements document in 10 steps
Now that you know everything that you need to about BRDs, it’s time to think about writing one.
To create a powerful BRD, we need to go over a few important steps involved in creating it.
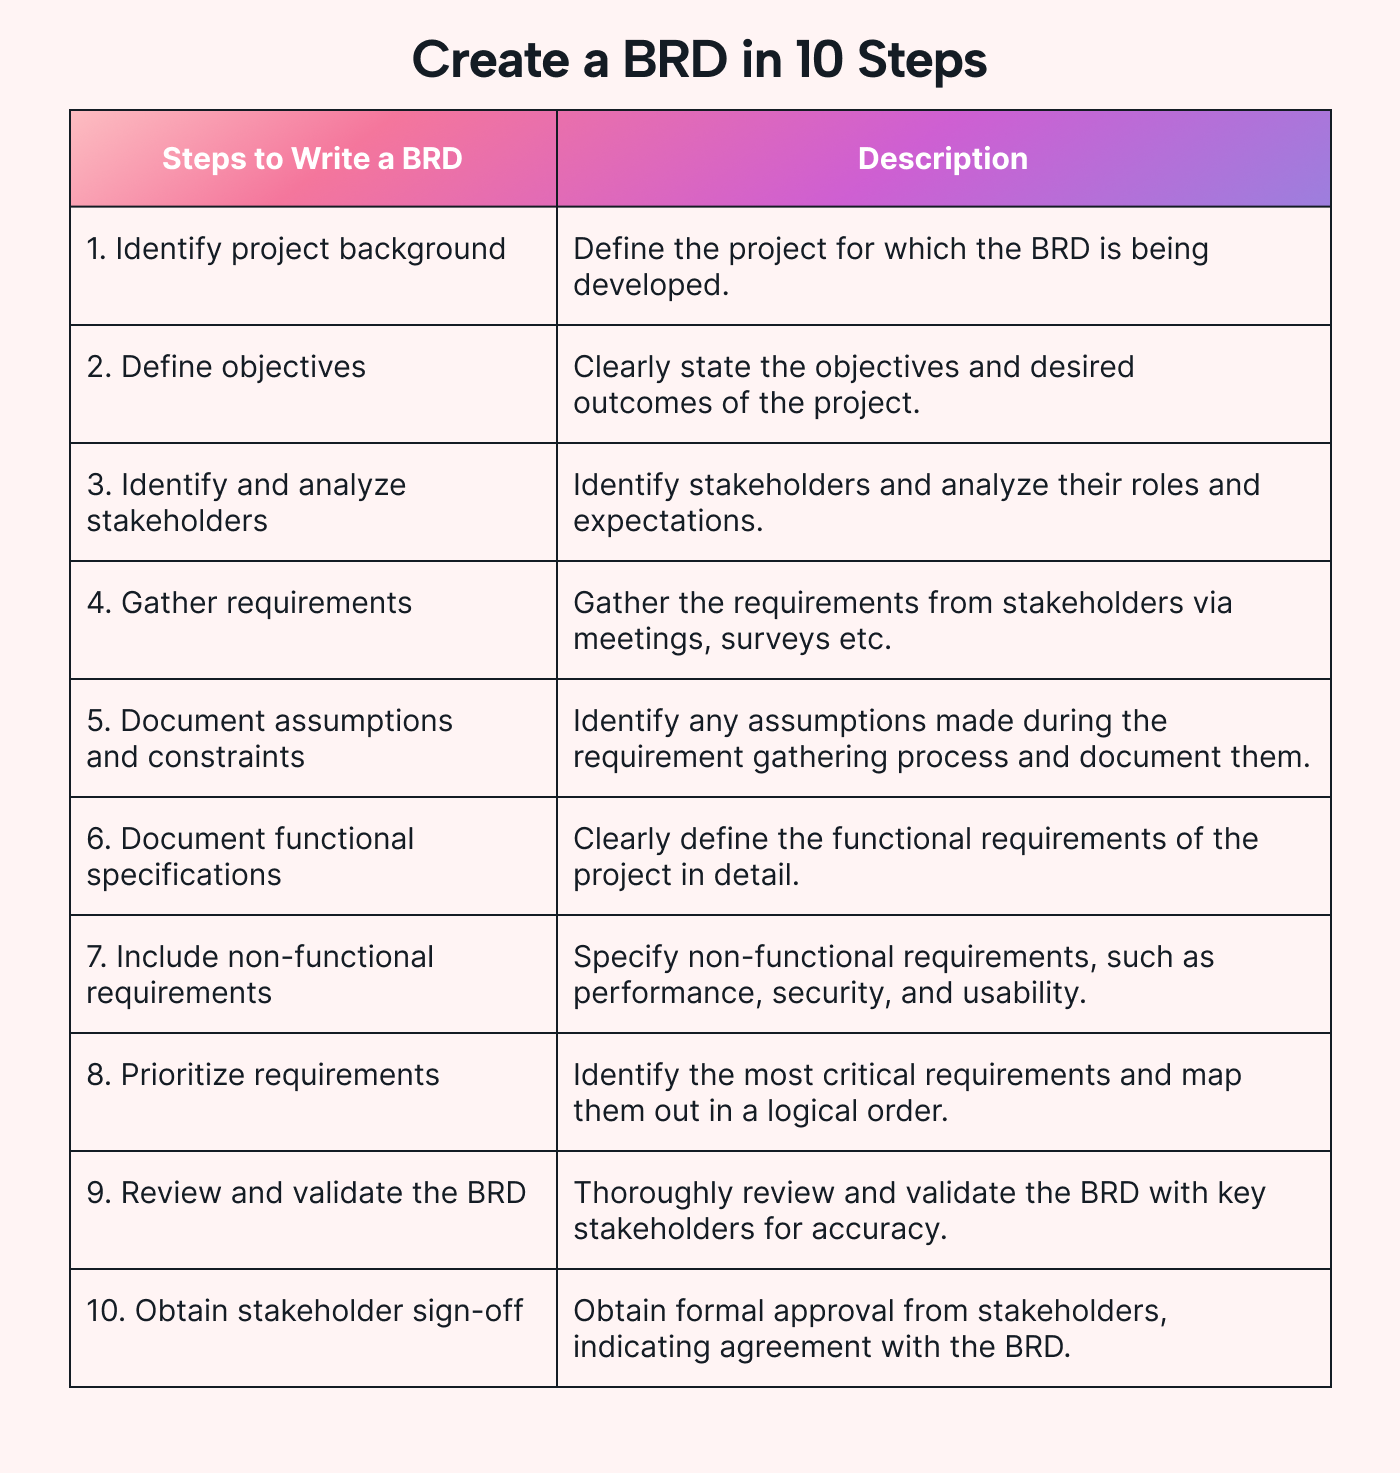 |
Above is a quick breakdown of the steps before we dive into the details.
Step 1: Project background
The project background provides context for the BRD. It establishes the purpose of the document, and it describes what the project aims to achieve as well as why it's significant.
For example, let’s say you are working on creating an app for a restaurant. In the project background section, we'll explain the goal of creating a user-friendly app for customers to order food easily.
Step 2: Define objectives
In this step, you should articulate the business objectives outlined in the project scope. These objectives can come from the project charter or business case. You should also link the project objectives to measurable outcomes. This way, we get a clear objective and can measure the project's success or evaluate it.
For example, if the objective is to increase customer satisfaction, a measurable outcome could be to achieve a 20% increase. We can also make it timebound and say it has to be done within six months of launching the project.
Step 3: Stakeholder analysis
Next, you should identify and analyze the key stakeholders for the project.
Stakeholders are individuals or groups that can influence a project's outcome. When analyzing them, focus on their roles, responsibilities, and expectations.
Step 4: Gather requirements
To gather info from stakeholders, try interviews, workshops, or surveys. Try to tailor these around their needs, expectations, and desired outcomes.
Here, you need to dig deep and listen carefully to what stakeholders say. You should ask open-ended questions to encourage them to provide detailed and specific information.
This way, you can capture all the important requirements accurately.
Step 5: Document assumptions and constraints
In this step, you should document the assumptions and project constraints related to the project goals.
Assumptions come from beliefs we create about something without having concrete evidence. Constraints are the limitations or restrictions that may affect the project's execution.
Let's use an example. In this one, we are developing a website for a client. An assumption could be that website users will know how to navigate through web pages. A constraint could be that the website must be compatible with a specific web browser.
Step 6: Document functional requirements
Next up, you should focus on capturing the functional requirements that outline the desired capabilities of the system and what it must do to meet business needs.
 |
Depending on the project's complexity, these requirements may be included in the BRD or may be documented separately. You should also use clear and concise language to describe the functionalities required. Here are a few examples:
- Customers should receive email notifications for order confirmation.
- The system should generate reports on sales, inventory, or customer data.
- Administrators should be able to manage user accounts and access control.
- The system should have a search function to help users find specific items or info.
Step 7: Document non-functional requirements
You also need to identify and write down the non-functional requirements of the system.
These requirements focus on factors like performance, usability, security, and other quality aspects. Basically, they are the requirements that fall outside the basic function of the system. However, they still contribute to the success of the system.
Step 8: Prioritize requirements
Now, you should prioritize the requirements you gathered based on their importance and impact. There are many different prioritization techniques you could use to do this.
Step 9: Validate and review
After ranking the requirements, you should get the BRD validated and reviewed. This makes sure that the requirements accurately capture the project needs and align with the project deliverables.
To validate the requirements, you can engage stakeholders and ask for their feedback. This way, you can see if the documented requirements meet their expectations and make changes if needed.
You should also conduct a full review of the BRD. Check the language used and the details, and ask your team to review it.
Step 10: Get it signed
In the last step, you share the finalized BRD with the stakeholders and get their sign-off. Sign-off guarantees that all parties involved agree and formally approve the documented requirements.
To obtain sign-off, you can circulate the BRD among the stakeholders and allow them to review it. Make sure it is clear who has authority to approve the BRD. This is an important milestone in the BRD creation process. Knowing that the documented requirements are approved can give you a ton of confidence to tackle the project.
Extra tips for a powerful BRD
To create a more compelling and useful BRD, try these tips:
- Use visuals: such as diagrams, flowcharts, or wireframes
- Include use cases: or scenarios to illustrate how the system will be used
- Define success metrics: or key performance indicators (KPIs) to track the achievements
- Think about user experience (UX): by capturing user interface (UI) requirements
- Involve subject-matter experts: especially for complex or specialized domains
- Keep the BRD updated: to track changes
Why brevity is key
A good BRD must contain a lot of information. But, at the same time, we now live in an Agile world where brevity is prized. A general rule of thumb is that effective BRDs shouldn’t be more than 3-4 pages. And no, changing to an 8pt font isn’t a practical solution.
The modern approach in business is to produce lightweight and compact documentation across the board. Interestingly, it’s not as modern as you might think. In his Lettres Provinciales, written more than 350 years ago, the French philosopher and mathematician Blaise Pascal famously wrote: “I would have written a shorter letter, but I did not have the time.”
When writing a BRD, you must make the time to keep it short, sharp, and to the point. The details can be found in the related documents discussed earlier, such as the FRS, FRD, URD, PRD, or NFRD.
Keep in mind though that brevity or length is based on what you want to achieve with the BRD. If it's a high-level view, brevity works. On the other hand, if you're looking for bids or responses to a request for proposal (RFP), you need not just the BRD but a statement of work (SOW).
Organize your next project with Motion
A Business Requirements Document steers your project and team in the right direction. Get ready to create one for your next project to ensure clarity, alignment, and effective management of project details.
When the time comes for detailed planning and execution, Motion will help you optimize your processes, collaboration and tasks. Its AI-powered task management features will help you align your BRD requirements with project tasks and project milestones.
Tasks can be created, assigned to team members, and linked to specific BRD requirements. This not only helps with the tracking of progress to ensure things go smoothly. It also schedules time for your team to work on the assigned tasks throughout the project lifecycle. And Motion will optimize your team’s schedules based on their available work time, tasks, and events.
Join the growing community of professionals who rely on Motion to simplify their project planning and management. Sign up for a free trial now.

After 40-odd years of working in technology, project management, media, and marketing, Brian's career and growth journey has exposed him to a wide range of niches. He brings this breadth of knowledge and expertise in his content work through enriched storytelling and original concepts that make SaaS content engaging and accessible for readers of all stripes.


