
Many project management approaches overlook a critical phase that can impact project success. Project design is the missing link (project phase) that sets the stage for other project phases.
Teams can struggle to align ideas and objectives without a well-defined project design. Stakeholders may lose themselves in the complexities of project execution because of a lack of clarity. And scope creep can set in and infect every deliverable and stage of your work.
But what exactly is the design phase? And how do you create a successful design document?
Together, we’ll answer these questions and guide you toward project design success. We’ll also show you a few tips and tools to help control these and even other phases.
What is project design?
Project design is sometimes called the “lost” phase of the customary five project management stages. It is a primary phase in a project’s life cycle, usually preceding the design of a project plan or charter. This is because it concentrates more on the general view of the project rather than its minute details.
 |
Once the project design phase is done, it's followed by the creation of a project proposal, project charter, and project plan. These project documents typically draw details from the overview that the project design gives. They'll then be used to manage the rest of the phases of the project life cycle.
For simple and small projects, the project design can replace the proposal and project plan. In these cases, it greatly simplifies the whole project lifecycle management process.
Project design is an opportunity to harmonize concepts, processes, and outcomes. Visuals like flowcharts, Gantt charts, and timelines are frequently used to give stakeholders a clear view. The stakeholders are also sometimes given multiple choices, so they can pick the one they believe best meets their requirements.
What is included in project design?
This document phase requires a few key project elements, such as:
- A project overview of the objectives, scope, and intended outcomes.
- The chosen methodology for project execution such as Agile or Waterfall.
- This phase identifies the key deliverables, products, or features that the project aims to achieve. Therefore, it’s best to include them during this step.
- A preliminary budget estimate. It doesn’t have to be a detailed financial breakdown; a rough estimate is all you need.
- An outline of precise mechanisms for monitoring and evaluating project progress. This includes milestones, checkpoints, and performance metrics (KPIs).
- The design document should have a rough estimate of the time needed to complete the project.
- The project design defines the roles and responsibilities of the managerial stakeholders.
How to create a project design in 8 steps
Now that we know what a project design is and what it entails, let’s go over eight steps you can use to create one.
1. Identify the project purpose and objectives
To begin, you should first clearly define the purpose and objectives of the project. Look beyond the immediate goals and focus on the bigger picture.
Think about the following when identifying the project's purpose and objectives:
- Reflect on your company's mission and vision as you want the project to align with its broader goals.
- Articulate the core problem your project intends to solve or the value it aims to create.
- Clearly outline the measurable objectives that will determine the project’s success.
2. Conduct a needs assessment
Once you know the aim and goals of the project, the next step is to evaluate stakeholder requirements. This assessment aims to understand their challenges, expectations, and requirements.
To do this:
- List all parties involved in the project — team members, users, clients, and anyone impacted. Then, rank them in terms of importance and influence on the project.
- Ask (highly influential) stakeholders about their pain points, desires, and expectations. Hold interviews, surveys, and workshops to gather information.
- Rank the gathered information in order of importance.
- Compare current project goals and stakeholder needs. Try to identify where discrepancies exist — these are your gaps to fill.
- Capture concise project requirements based on stakeholder input.
- Use these in the next step to define the project scope.
3. Define the project scope
In Step 3, we’ll define the project scope — a pivotal task where you create distinct boundaries. This entails outlining what your project will cover and, equally, what it won’t.
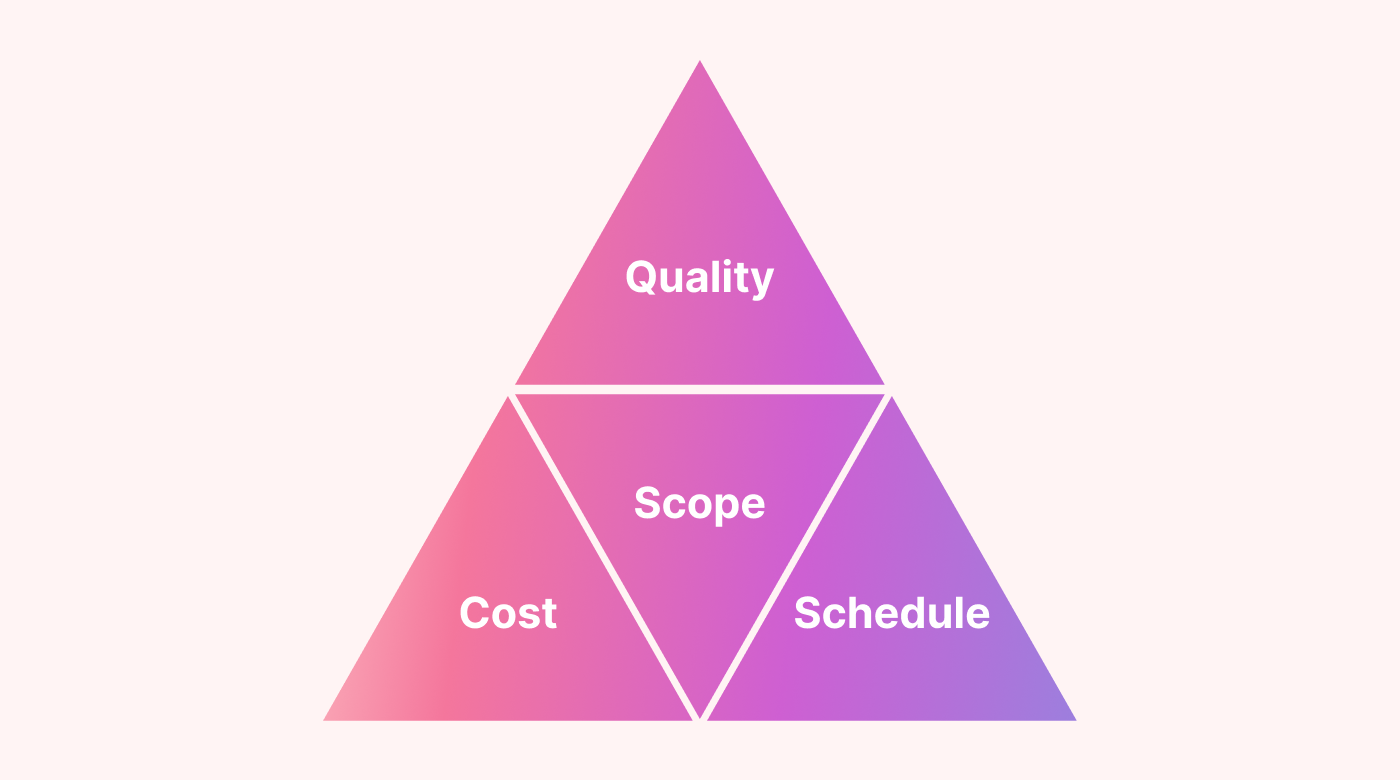 |
- To start, you define the outer limits of your project’s reach. Think about your resources, timeline, capacity, and quality of the major deliverables.
- Then, specify what exactly falls within and without your project’s scope.
With a well-defined scope, you have a solid benchmark to evaluate changes. This prevents uncontrolled expansion (scope creep) that could derail your project’s progress. Another benefit of a well-defined scope is that you can use it to set (and manage) stakeholder expectations.
4. Develop a project work plan
In this step, we will create a work plan outlining important project tasks and activities.
To do this:
- List all tasks necessary to complete your project.
- Break down large goals into smaller, manageable tasks.
- Then, organize the tasks logically (keep in mind any dependencies).
A helpful approach is to envision the outcome and work backward.
Another strategy is to use a work breakdown structure (WBS). This tool breaks down all work in a hierarchy that makes visualizing work easy. It also checks if all work has been considered or outlined in the plan later.
5. Estimate resources required
We must identify and estimate the resources required to execute the project successfully. Resources are things like personnel, equipment, materials, or a budget.
To estimate resources, you can:
A) Identify the resources you need for each task in your project work plan. Then, estimate the quantity required for each resource. And take into account any dependencies between tasks.
B) If you’ve used a WBS, you must determine the resources for each task. (The lowest level of the WBS gives you the tasks.)
6. Assign managerial roles
It’s common practice not to mention specific roles of lower-level staff, as this document will likely go through many iterations. However, identifying the managerial roles and their responsibilities is essential, as they’ll nurture the project from this phase into existence.
Here, you’ll capture the roles and responsibilities of senior-level stakeholders and managers. You’ll also have to ensure that the assigned duties align with the leaders' expertise.
7. Risk assessment and mitigation
We need to find any risks and plan to lower the impact or avoid them.
Here’s a quick way to do this for the design:
- List out any potential risks that could impact your project. These could be anything from unexpected resource shortages to technical difficulties.
- Determine how likely it is for each one to occur.
- Develop strategies to lessen the impact of identified risks. Think of proactive steps to prevent them and contingency plans to handle them if they arise.
8. Finalize the project design document or presentation
Once you’ve gathered all the essential information from the previous steps, it’s time to create a comprehensive project design document. After that, you should present it to the relevant stakeholders and get their approval.
Visual tools for the project design phase
Using visual aids can greatly help to convey the message and create a better group understanding.
Here are several powerful visual tools that are helpful during this phase:
- Flowcharts are graphical representations that depict processes, sequences, and decision points. They help identify bottlenecks, decision pathways, and potential inefficiencies.
- WBS breaks down the project into manageable components. As mentioned, this helps identify all necessary tasks and lets you see what resources you need.
- Gantt charts display tasks along a timeline. You can visualize the project schedule, dependencies, and task durations with them.
- Kanban boards are often associated with task management but can also help with the project design phase. You can create a Kanban board to outline the different steps and activities of the project visually. Each column can represent a crucial phase in the design process, such as gathering requirements and conceptualizing. Within each column, you can place cards representing specific tasks or activities related to that phase.
- Mind maps visually capture ideas, concepts, and their relationships. They’re particularly helpful for brainstorming sessions and organizing thoughts around project components.
- PERT is an acronym for (program evaluation and review technique). PERT charts facilitate understanding project timelines and potential bottlenecks.
Plan your project design with Motion
Months (or years) of planning and testing came before Lance Armstrong took his first famous step on the moon, and before that came the project design. The project design was the guiding light of the project during execution and planning to help them reach success.
To help you reach newer heights with your project phases, try out Motion, a leading project management tool. It features an automated task manager that you can use to help you plan out work to be done (like a mini-WBS).
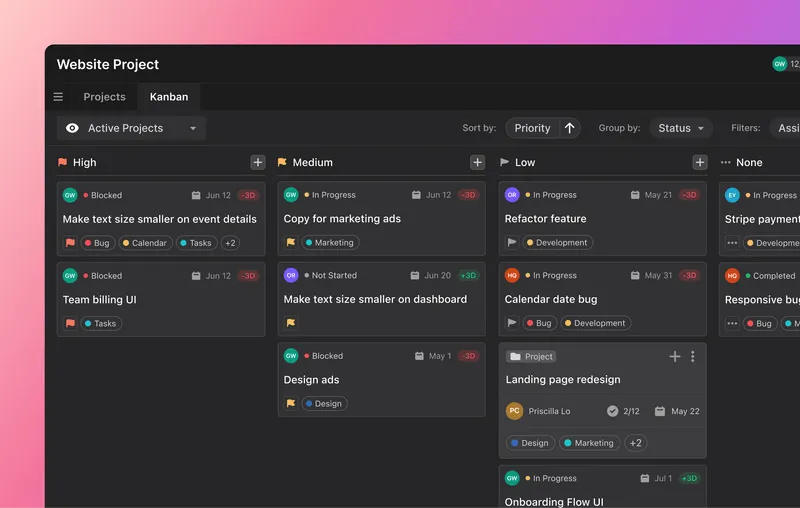
With Motion’s built-in Kanban board, you can take project design to the next level. Here, you can organize tasks, workflows, and project stages to get a good overview of the work that has to be done. You can then save the project (and tasks you’ve defined), and when it goes into the planning phase, you can use the one you saved to allocate resources.
Try Motion today, and grab your 7-day free trial.


